![]()
Opigno LMS User manual
Tool "Video gallery"
Installation
Opigno offers a tool allowing to add video galleries inside courses. This tool will convert the video from the source format (mp4, ogg, avi, mov, wmv, flv, ogv, or webm) to the desired format (for example H264 format) allowing the compatibility for both recent browsers with HTML5 compliance, and for older browsers using Flash technology.
This is an additional tool that requires to be installed from the Apps management interface (please refer to the section dedicated to Apps management for more details - Apps management).
To make the video conversion possible you will have to install an additional package on the server. For Debian/Ubuntu OS you will have to run the following instruction:
apt-get install ffmpeg
Once everything installed, you will have to go to the following URL to manage the settings:
<Opigno root path>/admin/config/media/video/transcoders
Where you will be able to select the FFmpeg transcoder (see below). If necessary adapt the path to the binary file, and save.
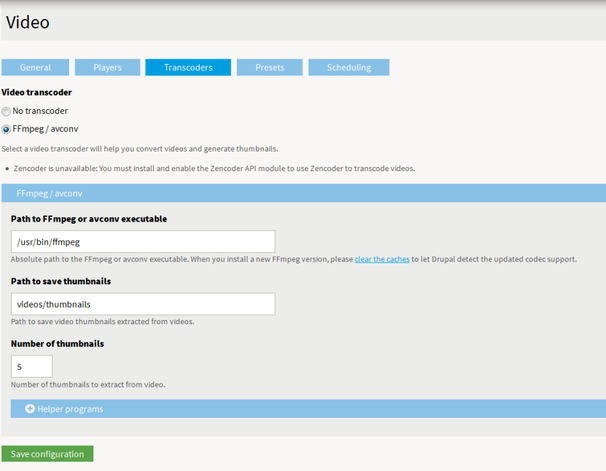
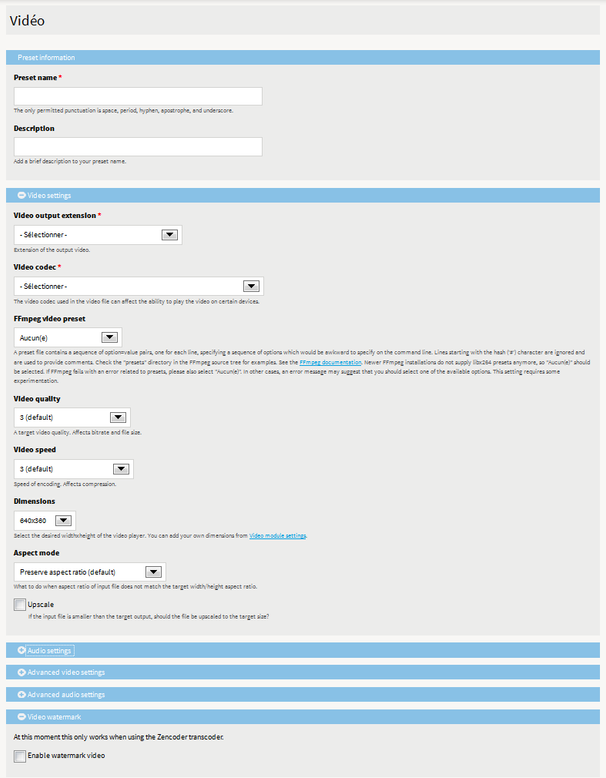
Then, going into the "Presets" tab, you will be able to add a preset if you want to define some specific parameters for the video conversion.
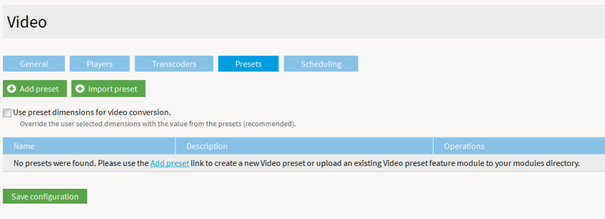
In the presets you will be able to define the default output format and dimension, add a watermark, etc... (see below)
The video tool is then ready to be used.
Add a new video
The video tool will be accessible inside courses by clicking on the following button: ![]()
Inside this tool interface, you will find (as a platform administrator, course manager or course teacher) a button "Add video".
![]()
The interface allowing to add the new video is the following:
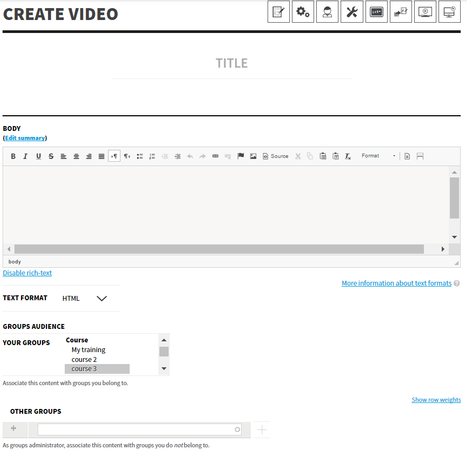
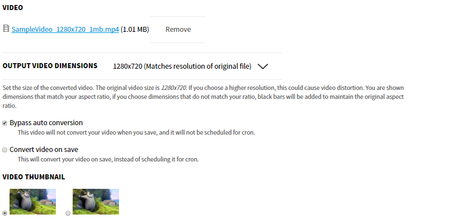
Once the video file uploaded, you will be offered the following options:
- Bypass auto conversion: this will prevent the video from being converted. The original format will be kept.
- Convert video on save: this will force the conversion of the video when saving. If neither this option is checked, nor the first one, the conversion will be done during the next CRON running.
- Video thumbnail: some thumbnail images are automatically processed by Opigno; you can choose one of them to be displayed in the video gallery.
After the video has been added, it will be displayed in the gallery:
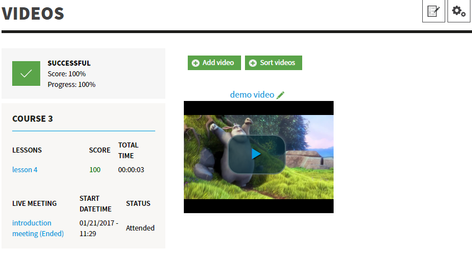
Students will be able to view the videos by clicking on them.
Sort videos
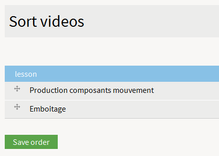
Platform administrators, course managers and course teachers are able to sort the videos inside the gallery. To do that, when entering inside the video tool, simply click on the "Sort videos" button.
![]()
Then, reorder the videos by drag&drop, and save.
Insertion of videos inside slides
Once the video tool installed, you will also be able to insert videos inside slides of lessons.
To do that, you will first have to adapt some setting on your Opigno platform.
First, visit the text format management interface at:
http://<your url>/admin/config/content/formats
You will have to uncheck the following option for the text format you will use to manage slides:

By default the HTML format is used for content management inside the platform. You can then simply click on the "configure" button associated with this format, then uncheck the above option and save.
Please note that unchecking this option will potentially open a security weakness for your platform. If security is important for you, then we advise keeping the HTML format like it is, and create another text format, only for platform administrators, and where the above option would be unchecked. Of course only platform administrators would then be authorized to add videos inside slides.
Then go to the WYSIWYG profiles management at:
http://<your url>/admin/config/content/wysiwyg/profile
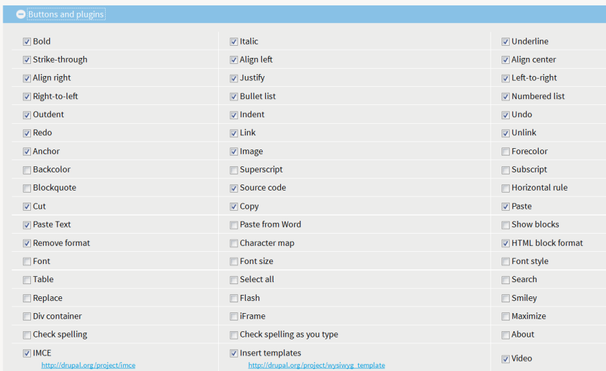
For the text format you will use to add videos inside slides (HTML, or new format you may have created for this purpose), click on the "Edit" link:

then check "Video" inside the section "Buttons and plugins", and save.
The initial configurations are now finished, and you are ready to insert videos inside slides, using Opigno WYSIWYG editor.
The first step consists in creating the video inside the dedicated Opigno Video tool (only videos created inside this tool can then be inserted using the WYSIWYG tool).
Then, when editing a slide, you will be able to click on the following button inside the WYSIWYG toolbox:
![]()
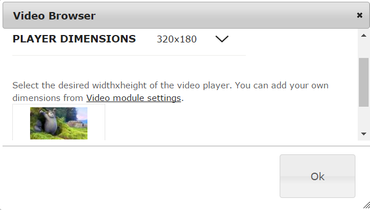
A popup opens, and offers to choose the video and its dimensions:
Copyright 2021 Connect-i. All Rights Reserved - https://www.opigno.org