![]()
Opigno LMS User manual
Tool "Lesson"
Lessons is an important tool, that allows to manage both theoretical content and quizzed to assess the students' knowledge.
A lesson can be:
- purely theoretical: it means it will be composed of slides with content managed by Drupal, and allowing to add pictures, videos, text.
- purely quiz: only questions of different types
- mixed: in this case the lesson will contain slides of the two previous content types, allowing to add some questions at the middle of the theoretical content to make the lesson more dynamic and the student more active.
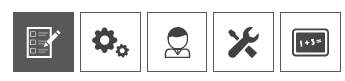
Lessons can be reached inside a course by clicking on the fifth pictogram from the left:
The interface (for teachers and administrators) is like follow:
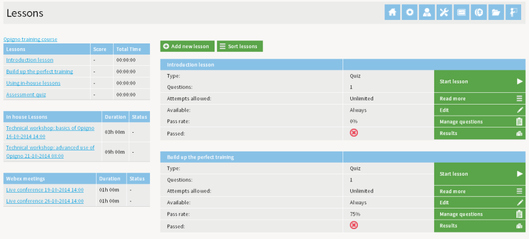
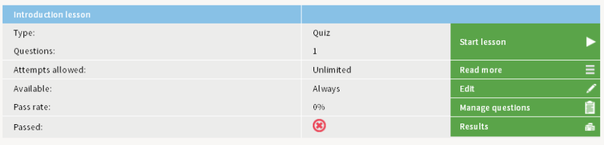
On this page:
- Start lesson: allows to start the lesson
- Read more: allows to view the full details about the lesson
- Edit: allows to manage the settings for the lesson
- Manage question: allows to manage the questions (or steps) inside this lesson
- Results: allows to consult the results obtained by the students for this lesson
Add a new lesson
After clicking on the lesson tool on the course homepage, you get a list of all lessons. At the top of this list a link "Add a new lesson" allows to add a lesson.
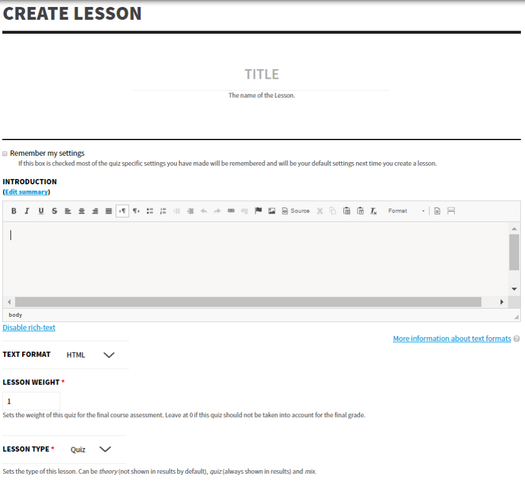
The form is the following:
6 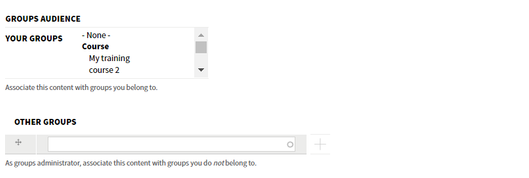
It is composed of the following parts:
Main settings:
The main settings are the following ones:
- Title: The title of the lesson
- Remember my settings: when checking this option, the settings used for this lesson will be used as default settings for the future lessons
- Body: The description of the lesson, that will be displayed on its start page. Opigno offers the CKEditor that offers nice WYSIWYG capabilities.
- Lesson weight: the weight is used to calculate the global score for the course, which will be the weighted average score for all lessons inside the course. In other words, the score for the course will be: (score_lesson_1 * weight_lesson_1 + … + score_lesson_n * weight_lesson_n) / (weight_lesson_1 + … + weight_lesson_n).
- Lesson type: The lesson type has to be chosen between quiz, theory and mix (see above for details). This choice will impact the lesson's management interface, that will be simplified to present only relevant question types. If you choose a "theory" type all the quiz questions will be hidden, and only content slides will be available. If you choose "quiz", only the quiz questions will be presented. And with "mix" everything will be presented.
- Groups audience: you can choose here the courses in which this class will be integrated. By default the current course is selected. The first select list displays "your groups", which means groups you have created or groups you are member of. The second autocomplete field is only displayed to platform administrators and allows to define any other course.
Other advanced settings are available at the bottom of the form.
Feedback options:
The first tab, named "Result Comments", allows to define the global feedback to be displayed to the student after he finishes the quiz. To do that, you will define ranges for score (min - max values), named "Result option i", that you will associate with a comment.

Pass/Fail options:
The tab named "Pass/Fail" is important to have a look since making possible to define the criteria for lesson's validation.
You can set here the Pass rate for Lesson (%): this is the minimum score (in % of the maximum score possible) the user will need to obtain to pass the lesson. You can set a minimum score according to your requirements.
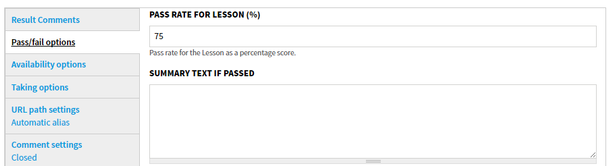
If you simply want to have an overview of the students' level, but not block users (for example for an entrance test), you can set the pass rate to 0%. In case of a theoretical lesson, if you just want to make sure that students have browsed into each slide, you will also make the lesson required for the course validation, with a pass rate of 0%.
Availability options:
In the tab named "Availability options", you will define if the lesson has to be always available, or opening and closing dates. Outside these dates the lesson won't be available.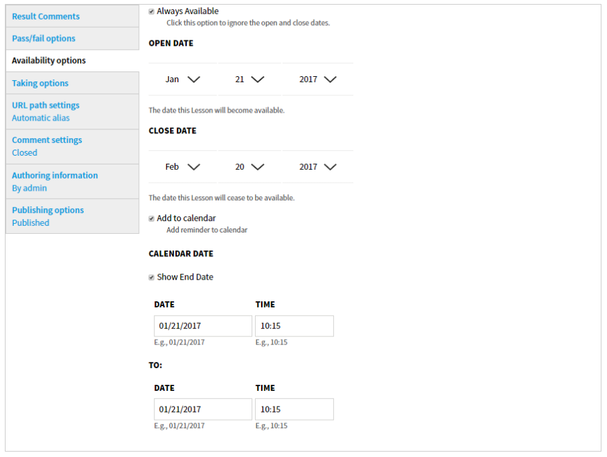
This makes also possible to decide if a lesson has to be added to the calendar for all the course participants. In this case, simply check "Add to calendar" and choose one date or a period composed with a start date and an end date.
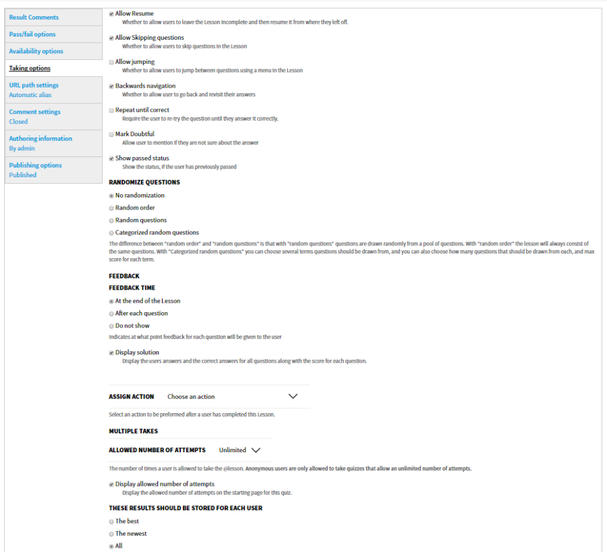
Taking options:
The tab "Taking options" is dedicated to the way students can answer to the quiz. You can define:
- Allow resume: possibility for users to stop the lesson they are browsing, and resume later at the same point
- Allow skipping questions (for quiz): the user can leave a question blank and finish the quiz
- Allow jumping: possibility for the user to browse the slides/question in an order different from those defined by the lesson's author
- Backwards navigation: possibility to go back in slides/questions
- Repeat until correct (for quiz): the user will have to retry each question until he finds the correct answer, and then go to the next question
- Mark doubtful: allows the student to mention if he is not sure about the answer
- Show passed status: displays the status if the student has previously passed the lesson
- Randomize questions: 4 different modes are offered concerning the way to randomize the order in which questions/slides will appear.
- Assign Action: an action that will be performed once the student has passed the lesson (actions are related to Drupal rules)
- Allowed number of attempts (mainly interesting for quiz): the maximum number of times a student can do the quiz
- These results should be stored for each user: you can here define, in case of multiple attempts, which score has to be taken into account (the latest, the highest, or every one)
Edit global settings of a lesson
To edit the global settings of an existing lesson, you can simply go to the lesson home page, and click on the "Edit" tab at the top of the page.
You will then find the settings explained at the previous section of this document.
Add questions / slides to the lessons
Once a lesson is created, you will probably want to add question and/or slides to it.
To do that, you will click on the "Manage questions" tab at the top of the page.
You will then reach the following interface.

By clicking on the "Create new question" link, the list of available questions will open (see below for more details), making possible to choose a question type and define its content and settings.
In the area "Questions in this lesson", you will see the list of questions inside this lesson. Edit and Remove links will allow to manage questions. The maximum score for the question will also be defined here. By default it is calculated as the maximum number of points possible to have with the question, according to the points you granted for each answer possible. Auto update max score means that if you modify a question (add or remove correct alternatives for a multiple choice question for example), the max score will be automatically re-calculated by adding the scores for all the alternatives offered inside the question. If not checked the max score will remain the same even if you modify the answers.
By clicking on the "Browse for questions to add" link, you will be displayed the list of all questions used for your platform (a pool of questions) and be able to simply select one to add it to the current lesson.
Available types of questions:
The available question types are the following:
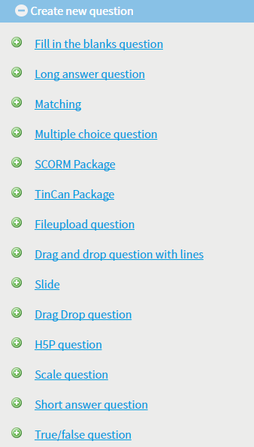
Here is a description of each of them:
Question type | Description |
|---|---|
Fill in the blanks question | A text with missing words, the user has to fill-in. |
Long answer question | Question proposing the student to write a long text to answer. The scoring of this question will have to be done manually. |
Matching | Question requiring to match the elements from two columns. The elements in the first column will be fixed and randomized, and the ones in the second column will be presented in dropdown boxes. |
Multiple choice question | The classical question with many possible answers. One or more answers may be defined as correct. The score is defined for each possible answer, and may be null, positive, or negative (in case of wrong answer). |
SCORM package | This question makes possible to insert a SCORM package into the lesson ; the results obtained inside this package will be retrieved in Opigno. |
TinCan package | This question makes possible to integrate a TinCan package (zip file) inside a lesson; the results obtained will be stored in Opigno. |
Fileupload question | This question offers the student to upload a file containing his work. The scoring of this question will have to be done manually. |
Drag and Drop questions with lines | This question makes possible for the user to select zones inside a picture. At the moment the zones can only be circle-shaped. |
Slide | This is a theoretical content slide, no answer is awaited from the student. |
Drag Drop question | This question offers the user to match pictures and labels, by drag and drop. |
H5P question | This question type makes possible to easily create rich HTML contents using H5P technology. |
Scale question | A question proposing to answer to questions using a scale (for example "Never - Always" or "Totally disagree - Totally agree"). |
Short answer question | A question the user has to answer with a short text. The scoring can be either automatic, either manual. |
True/false question | A question that has to be answered with true or false. |
The creation of a question is quite similar for all question types, even if each of them offers some specific settings.
You will have basically to define the question, the possible answers, and the feedback.
Note: when browsing lessons, users can switch in full screen display mode, simply by clicking on the arrows on the top right corner of the slide: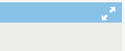
To exit the full screen view, you will have to click again on the arrows at the top right corner of the page: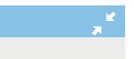
Creation of slides for theoretical content
Opigno makes possible to create slides of theoretical content.
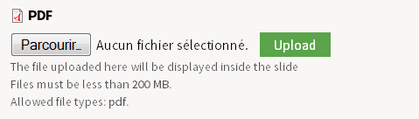
Slides can be either created using the WYSIWYG editor, including the use of pre-defined templates (more details below), or can be created by loading a PDF file that will be displayed inside the slide.
Integrate PDF file inside a theory slide:
To do that, in the dedicated section of the slide creation interface, simply load a PDF file.
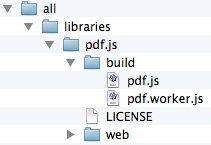
This feature requires to install an additional library (that cannot be integrated by default into Opigno). The installation is very simple and implies to download the pdf.js library from: http://mozilla.github.io/pdf.js/getting_started/
then extract it into your Opigno libraries directory (/sites/all/libraries). The folder in your libraries folder must be named to pdf.js. Make sure your directory structure like this:
Some problems having been reported with the version 1.4 of pdf.js, you may try instead this version:
https://github.com/mozilla/pdf.js/releases/tag/v1.3.91
Use templates for theoretical content
For theoretical lessons, the slide creation can be facilitated by the use of templates. The platform administrator can also make sure that the corporate identity will be respected by the teacher creating courses' content if they use platform-defined templates.
Opigno offers by default some templates. You can of course add new templates as a platform administrator by clicking in the Administration area on "WYSYIWYG templates", and creating your templates with HTML/CSS code.
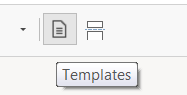
You can use the templates when creating a theoretical slide by clicking in the WYSIWYG menu on the dedicated button:
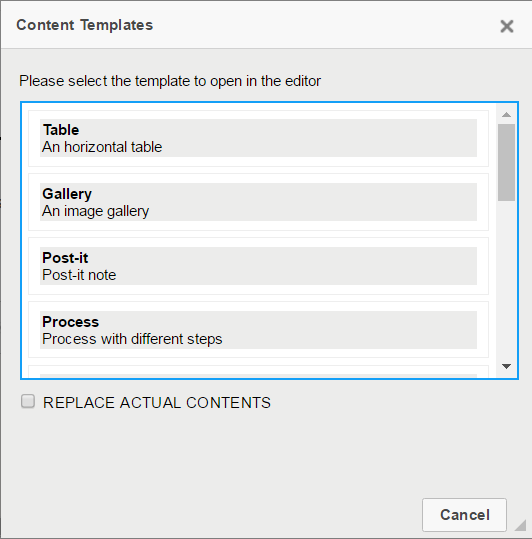
You will then be able to choose among the list of available templates and to use one of them by clicking on its name
You can then edit its content with the editor.

Sort lessons
To sort the lessons inside a course, just go into the course and then into the "Lessons" tool.
Then, click on "Sort lessons".
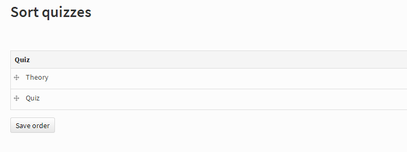
You can sort the different lessons inside the course with drag and drop, and then save.
Consult results and manually score answers
From the list of lessons, you can click on the "Results" tab to consult the results for a lesson.
You get a table of all results of students to this lesson.
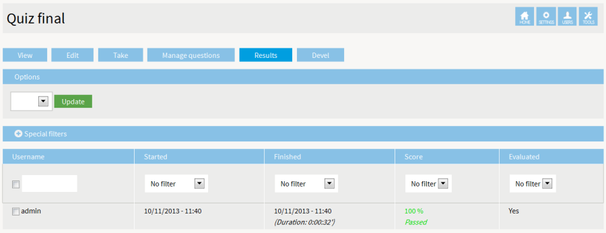
To view the details of the answers given by a student, or to score questions requiring manual scoring, just click on the "view" link under a username (the link appears when your mouse pointer is over the username).

You can then view the detailed results for each question. To score manually a question, just define the score in the dedicated area, eventually add a feedback, and click on "Save score".
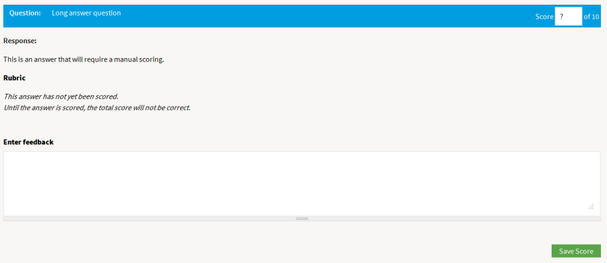
The scoring can be done either by the course teacher, the course manager, a platform administrator, or the coach of the class (if the course is part of a class).
Teachers will find more global statistics about their student's results and achievements inside their courses, by visiting the statistics available from the Opigno main menu.
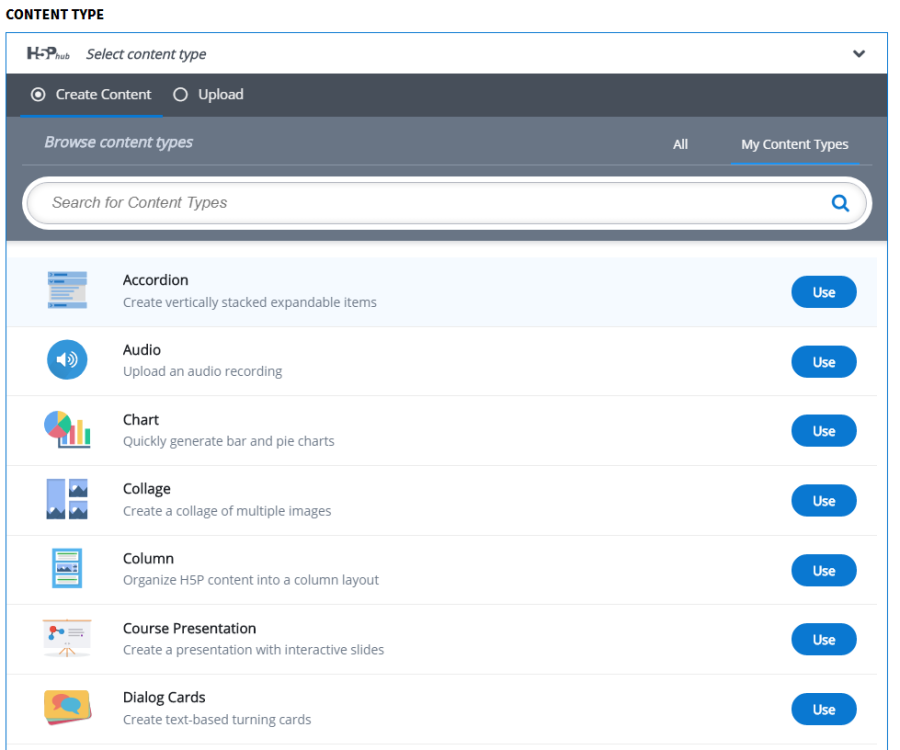
Using H5P question type to insert rich interactive contents
Opigno integrates the H5P technology (http://www.h5p.org). This makes possible to create rich interactive contents inside lessons.
A large panel of rich content types are available, among which interactive videos, memory games, and much more, that will make possible to create even more attractive trainings.
A select list makes possible to choose the most appropriate content type, as illustrated below:
Copyright 2021 Connect-i. All Rights Reserved - https://www.opigno.org